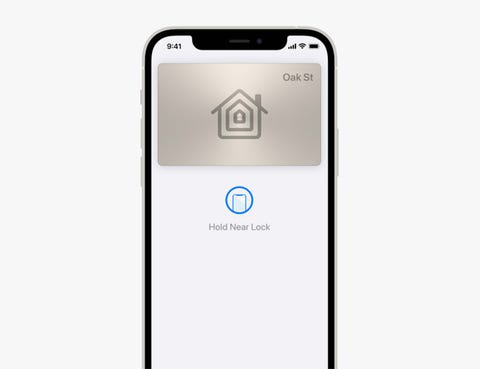
every iPhone since the 2015-released iPhone 6S has come with Apple’s Wallet app baked right into its operating system — although, the app was first rolled out as “Passbook” a few years earlier, in June 2012 with the launch of iOS 6, but evolved in Wallet roughly three years later — and it has evolved to become a really robust tool.
When it was first introduced (as Apple Passbook), the app was fairly limited. It essentially just stored things like boarding passes, gift cards and coupons; and while you can still do all of those things today with the Wallet app, you can also do a heck of a lot more
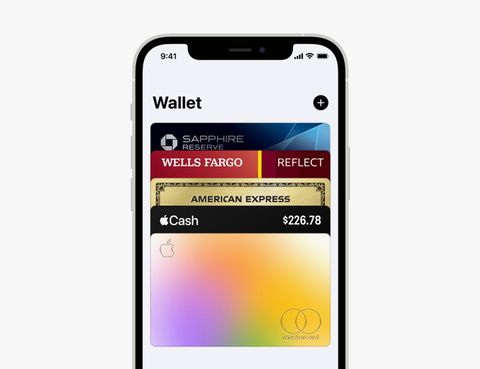
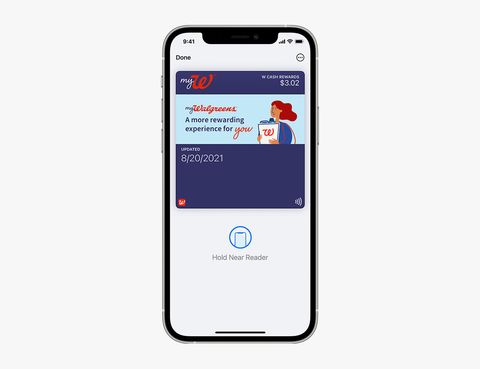
Today, the Wallet app allows you to store credit and debit cards, transit cards and various forms of ID, such as your student ID or driver’s license (although it does depend on what school you go to and what state you’re from). You can also store digital copies of your keys for your home (if you have a smart lock that works with HomeKit) or your car (if it’s compatible with Apple CarKey). You can even use it to store your COVID-19 vaccination card.
The beauty of Apple Wallet is in its simplicity. You can upload most of the things previously mentioned that would normally fit in your wallet, and you can instantly access them from your iPhone.
How to quickly access the Wallet app and Apple Pay
To quickly access the Wallet app on your iPhone, all you have to do is double-click.
• If you have an iPhone with a Home button, quickly double-click that Home button.
• If you have an iPhone that uses Face ID, quickly double-click the side button (for locking or powering your iPhone).
Once double-clicked, the Wallet will immediately pop up and you’ll be able to use a credit or debit card that has been linked. If you’re worried about anybody being able to grab your iPhone and make purchases — don’t. All purchases via Apple require a biometric authentication process via either Touch ID or Face ID, depending on which iPhone model you have.
How to add a credit or debit card to the Wallet app
Adding a credit or debit card to the Wallet app is pretty straightforward. All you have to do is:
- Open the Wallet app.
- Select the “+” button in the top-left corner.
- Select the option for “Debit or Credit Card.”
- Either scan or enter your card’s information manually.
Note: Not every debit and credit card works with Apple Pay, however most cards from credit card companies (including Visa, MasterCard, Discover, and American Express) and major banks (including Bank of America, Capital One, Chase, Citi and Wells Fargo).
You can find a list of the banks that support Apple Pay, here.
LEARN MORE
How to add your driver’s license to the Wallet app
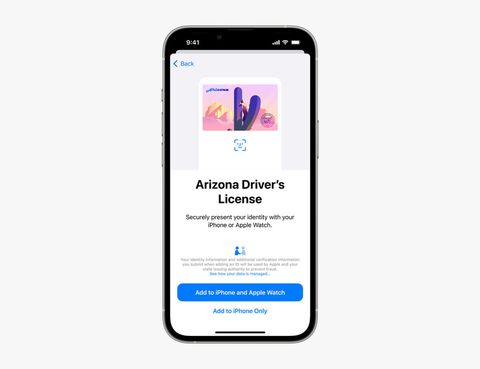
Apple only recently rolled out the ability to add your driver’s license to the Wallet app — but it’s still really limited. As of March 2022, Arizona was the only state that allowed its residents to take advantage of the ability — but it promises that more states are on the way. According to Apple, there are 11 other states that will “soon” roll out the feature: including Connecticut, Georgia, Iowa, Kentucky, Maryland, Oklahoma, Utah, Colorado, Hawaii, Mississippi, Ohio and the territory of Puerto Rico.
Once your state allows it, you can add your driver’s license by:
- Open the Wallet app.
- Select the “+” button in the top-left corner.
- Select the option for “Driver’s License or State ID.”
- Scan the front and back of your license and take a selfie photo.
- Follow the on-screen instructions to send the info to your state for approval.
LEARN MORE
How to add a boarding pass or ticket to the Wallet app — and then use it.
Apple makes adding a boarding pass (for train, plane, bus or other form of transportation) or ticket (such as from a concert or sporting event) pretty simple as well:
- Open the confirmation email or the app used to purchase the boarding pass or ticket.
- Tap the icon that reads “Add to Apple Wallet.”
- Follow the instructions on the screen.
Once added, you’ll then want to be able to access it so you can scan it or show the event/transportation staff to gain entry.
- Double-tap the Home button (for iPhones with Touch ID) or Side button (for iPhones with Face ID) to open the Wallet app.
- Tap your boarding pass or ticket for scanning.
Once you’re done with the boarding pass or ticket (say after your trip or event), you’ll then want to delete it from your Wallet. To do this: open the Wallet app > tap the pass you want to remove > select the More button (with the three dots) > confirm “Remove Pass.”
LEARN MORE
How to add your COVID-19 vaccination cards
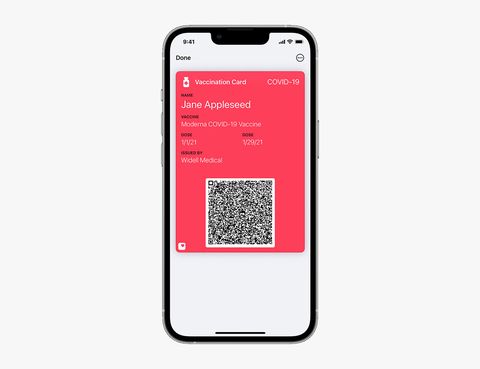
In October 2021, Apple rolled out the ability to add your COVID-19 vaccination card to your iPhone’s Wallet app with iOS 15.1. Admittedly, adding this can be a little complicated as everybody’s means of vaccination and the way they’ve gotten confirmation is a little bit different. Here are three scenarios:
If you have a QR code:
- Open the camera app on your iPhone.
- Make sure you’re using the rear-camera.
- Make sure the QR code is the focus of your iPhone’s viewfinder.
- Click the Health app notification that appears when the camera recognizes the QR code.
- Select “Add to Wallet & Health.”
- Select “Done.”
If you have downloadable link of your vaccination record:
- Click the download link.
- When the notification appears, select “Add to Wallet & Health.”
- Select “Done.”
If you already have your COVID-19 vaccination record added to the Health app:
- Open the Health app.
- Select the Summary tab (at the bottom).
- Under Vaccination Record, tap “Add to Wallet.”
After your COVID-19 vaccination card is added to the Wallet app, you’ll be able to access it any time you want. However, if you want to get the full details of your card — other than just your name, vaccine type and the date(s) you got vaccinated — you’ll have to authenticate yourself by using Face ID, Touch ID or typing in your passcode.
LEARN MORE
How to add your health or car insurance card to the Wallet app
Your iPhone’s wallet app can also hold your card insurance or health insurance cards. It’s pretty simple to do so, but it will require you to first download your car or health insurance provider’s app and set up your account through it.
(Note: Most insurance providers do have apps that support Apple Wallet, but not everyone does.)
- Download your insurance provider’s app, create your account and sign in.
- In the app, find the “Digital Card” section. (It might be a little different as each insurance providers’ app will be a little different).
- Select “Add to Apple Wallet.”
- Select “Add” if prompted.
How to add a digital key for your home to the Wallet app
If you have a smart lock that supports HomeKit, you can add a digital key to your Wallet app so that all you have to do is hold your iPhone next to the smart lock and, communicating via NFC, it’ll unlock your door. (You can set it up so that, in addition to having your iPhone nearby, it’ll require either Touch ID or Face ID as a secondary form of authentication to unlock your door.) You can then set up various animations so that your door locks shortly after you arrive or after you leave, but this is done within Apple’s Home app.
To do this, you’ll need to first buy and install a smart lock that supports HomeKit. There are quite a few of them out there, but August’s fourth-generation Smart Lock or the Yale Assure Lock SL are two of the most popular. From there:
- After setting up your smart lock (following the installation instructions), you’ll then add it to your iPhone’s Home app.
- Choose an unlocking option (if you want a second form or authentication in addition to your iPhone to unlock your door).
- Select your various automations (how soon after you leave or arrive will your smart lock lock your door again.)
LEARN MORE
This content is created and maintained by a third party, and imported onto this page to help users provide their email addresses. You may be able to find more information about this and similar content at piano.io
